Tuesday, December 28, 2010

rughelach


My father is Jewish and was raised eating things like matzo ball soup, chopped liver, and kreplach (Jewish dumplings for soup) at the holidays. I decided to celebrate my Jewish heritage and make something authentic for the holidays. My dad loves cookies, he loves to tell the story that one year his mom made 140 dozen cookies for Christmas and that every one of them got eaten. So I figured cookies would be a good way to go if I was going to make something for my dad. I was really pleased with these cookies. They make a big batch plus they're delicious. They taste a lot like cinnamon rolls. They're perfect for the holiday season.

Rughelach
adapted from The Barefoot Contessa
Ingredients
8 ounces cream cheese, at room temperature
1/2-pound unsalted butter, at room temperature
1/4 cup granulated sugar plus 9 tablespoons
1/4 teaspoon kosher salt
1 teaspoon pure vanilla extract
2 cups all-purpose flour
1/4 cup light brown sugar, packed
1 1/2 teaspoons ground cinnamon
3/4 cup raisins
1 cup walnuts, finely chopped
1/2 cup apricot preserves, pureed in a food processor
1 egg beaten with 1 tablespoon milk, for egg wash

Directions
Cream the cheese and butter in the bowl of an electric mixer fitted with the paddle attachment until light. Add the granulated sugar, the salt, and the vanilla, with the mixer on low speed, add the flour and mix until just combined. Turn the dough out onto a well-floured surface and roll it into a ball. Cut the ball in quarters, wrap each piece in plastic, and refrigerate for 1 hour.

To make the filling, combine 6 tablespoons of granulated sugar, the brown sugar, 1/2 teaspoon cinnamon, the raisins, and walnuts.

On a well-floured board, roll each ball of dough into a 9-inch circle. Spread the dough with 2 tablespoons apricot preserves and sprinkle with 1/2 cup of the filling. Press the filling lightly into the dough. Cut the circle into 12 equal wedges—cutting the whole circle in quarters, then each quarter into thirds. Starting with the wide edge, roll up each wedge. Place the cookies, points tucked under, on a baking sheet lined with parchment paper. Chill for 30 minutes.

Preheat the oven to 350 degrees F.

Bake for 15 to 20 minutes, until lightly browned. Remove to a wire rack and let cool.

Friday, December 24, 2010

Merry Christmas!


I just wanted to say merry Christmas and a happy New Year to all of you! Thank you very much for following me and reading what I write. I appreciate every single one of you being here and I can't wait to see what the new year will bring for me and the blog. I promise I'll cook up some good stuff to share with you all. Until then God bless and I hope you all get what you asked Santa for and more.

Wednesday, December 22, 2010

Alton Brown's mac and cheese


Sorry about the lack of updating exam week got me and then I got caught up with starting back at work. Luckily now that it's Christmas break I'll be able get in the kitchen alot and cook up some good recipes for you all. In any case you really need to try this macaroni and cheese because it's amazing. Also if you don't know much about Alton Brown you should look him up because his recipes, although they sometimes include unconventional ingredients or methods, are completely trustworthy and amazing. Plus his show Good Eats is witty, informative, and entertaning. In short he's my hero. Anyway this macaroni and cheese is great it's creamy and cheesy and the mustard and onions add amazing amounts of flavor. I know this isn't your typical mac and cheese but that's what makes it so perfect. It's also a perfect side dish for the holidays.

Macaroni and Cheese
Ingredients
1/2 pound elbow macaroni
3 tablespoons butter
3 tablespoons flour
1 tablespoon powdered mustard
3 cups milk
1/2 cup yellow onion, finely diced
1 bay leaf
1/2 teaspoon paprika
1 large egg
12 ounces sharp cheddar, shredded
1 teaspoon kosher salt
Fresh black pepper
Topping:
3 tablespoons butter
1 cup panko bread crumb

Directions
Preheat the oven to 350 degrees F.

Bring a large pot of salted water to a boil, cook the pasta to al dente.

While the pasta is cooking, in a separate large sauce pan, melt the butter. Whisk in the flour and mustard and whisk continually for about five minutes. When it's free of lumps Stir in the milk, onion, bay leaf, and paprika. Simmer for ten minutes and remove the bay leaf.

Mix a spoonful of the warm milk mixture into a small bowl with the egg to temper the egg and then add it to the pot. Add in 3/4 of the cheese. Season with salt and pepper. Fold the macaroni into the mix and pour into a 2-quart casserole dish and top with remaining cheese.

For the topping melt the butter in a saute pan and toss the bread crumbs to coat. Top the macaroni with the bread crumbs. Bake for 30 minutes. Remove from oven and rest for five minutes before serving.

Wednesday, December 8, 2010

peppermint bark


Christmas is rabidly approaching which means it's time for holiday baking! yay! The ball is already rolling at my house. Mom and I made a trip to Costco and our pantry is stocked in bulk with flour, butter, sugar, brown sugar, cocoa, dried milk, white chocolate, milk chocolate, dark chocolate, and mason jars. We've decided to make cookies in a jar and cocoa mix in a jar for family, friends, and select professors. Those recipes will be coming soon but this is what I chose to make when my friends at school decided to have a Christmas party. This recipe is simple, it makes a big batch, and every one loves it. Which I think qualifies it as a great holiday treat.
this recipe is actually a happy accident. My mom bought peppermint flavored Andes chips. I thought they were just normal crushed peppermints when I opened the bag I was sorely disappointed but I decided to throw them in any way. The results were good. You get peppermint flavor in every bite and you don't have to worry about the peppermint pieces not sticking or falling off when you bite into the bark.

Peppermint Bark

1 pound dark chocolate (60% cocoa works great)
1 pound white chocolate
1 cup Andes peppermint pieces

Melt the dark chocolate in a double boiler or a glass bowl set over a pot full of water. Spread the melted chocolate onto a parchment lined cookie sheet. Place the chocolate in the freezer for 20 minutes. Meanwhile melt the white chocolate in the same way let it cool slightly and then pour in the Andes chips. Remove the dark chocolate from the freezer and pour the white chocolate over the dark chocolate. Spread the white chocolate in an even layer over the dark making sure to work quickly so the two chocolates don't mix. Place the bark in the freezer for another 20 minutes. When the bark is chilled remove it from the freezer if you want neat little squares thaw the bark and then slice with a knife if you want rough shards of bark then while the bark is still frozen take the slab and drop it on the counter until the pieces are the desired size.

Sunday, November 28, 2010

pecan topped pumpkin pie


I love Thanksgiving. In fact it's probably my favorite holiday so I had a ball this week. I cooked up a storm and then ate to my hearts content. I was in heaven. On Wednesday I roasted two small pie pumpkins and made my own pumpkin puree, so the next order of business was pumpkin pie. Since I usually do pecan pie for thanksgiving I decided to combine pumpkin pie and pecan pie. The results were tasty.

Pecan topped pumpkin pie
adapted from better homes and gardens
ingredients
1 refrigerated pie crust (or home made if you're feeling industrious)
1-1/4 cups coarsely chopped pecans
3/4 cup packed brown sugar
1 15-ounce can pumpkin
1-1/2 cups half-and-half or light cream
3/4 cup granulated sugar
3 eggs, slightly beaten
1-1/2 teaspoons pumpkin pie spice
1/4 teaspoon salt
3 tablespoons butter, melted
directions
1. Preheat oven to 375 degrees F. Prepare Deep-Dish Pie Pastry. Mix pecans and brown sugar in small bowl; place 3/4 cup pecan mixture in bottom of pie shell. Reserve remaining pecan mixture for topping. Combine pumpkin, half-and-half, granulated sugar, eggs, pumpkin pie spice, and salt in large bowl; mix well. Pour into prepared pie shell.

2. Bake for 50 minutes or until just set in center. Add butter to remaining pecan mixture; stir until moistened. Sprinkle pie filling with pecan mixture; bake for 10 minutes more or until topping bubbles around edges. Cool on wire rack.

Monday, November 22, 2010

I have not gone AWOL


but the lens to my camera did break so the photo quality might go down until Christmas, forgive me I am a broke college student and can only hope to get a new lens from Santa. The main point of this post is to let you know I have not died and that post Wednesday there will be some good stuff coming your way, I promise. Please bare with me your patience will be rewarded. I hope you all have a happy happy thanksgiving.

Monday, November 8, 2010

bacon cheddar onion biscuits


My boyfriend and I spent Saturday morning doing yard work. It was fairly chilly and cloudy but we got everything done that we needed to. Over lunch we started discussing dinner plans. "I feel like making something really comforting." I said "Yeah something like a nice creamy soup" he replied. At exactly the same moment both of our faces lit up and we said "chili" so that was settled but there was still a very important issue on the table "corn brad or biscuits?" I asked. He paused for a second and then said with complete certainty "biscuits" So I went home and found this recipe on my computer. I found it a little strange that they're baked in muffin tins but boy am I glad I tried it, because they're baked in muffin tins they sides and bottom get all golden brown and the tops get nice and crunchy but the inside stays moist and dense. It also helps that the flavor combination is awesome. The next time you serve soup give these bad boys a shot I promise it's worth it.
Bacon Cheddar Onion Biscuits
Ingredients
2 cups All-purpose Flour
1 teaspoon Baking Powder
¾ teaspoons Salt
¼ cups Vegetable Shortening (crisco, Etc)
10 Tablespoons Milk (whole Milk Is Best)
4 Tablespoons Vegetable Oil
1 whole Egg
10 slices Thick Cut Bacon, Fried And Crumbled
1 cup Finely Diced Onion
1 cup Grated Sharp Cheddar Cheese
Preparation Instructions
Sift together flour, baking powder, and salt. Using a pastry cutter, cut in shortening until all combined.
Combine milk, oil, and egg in a separate bowl. Whisk together.
Combine flour mixture, milk mixture, bacon, onions, and cheddar cheese in a large bowl. Stir gently until all combined.
Spoon batter into greased muffin tins. Bake for 20 to 22 minutes on 375 degrees until golden Remove from pan and serve warm.

Sunday, October 31, 2010

PW's corn chowder


When it comes to cold weather I'm a wimp. If the temperature gets below 70 degrees I'm bundled up form head to toe and whining. There are some things I love about the cold though it gives me and excuse to break out my fuzzy blankets and knit sweaters, its perfect weather for curling up with a hot cup of coffee and a book, and its perfect comfort food weather. I love things like chicken pot pie, biscuits and gravy, and chili. So I guess the cold isn't all bad. I decided to kick off soup season with a recipe I had just seen on The Pioneer Woman's website. This corn chowder is creamy, spicy, and oh so comforting, perfect for a chilly day.

Spicy Corn Chowder

Ingredients
2 slices Bacon, Cut Into 1/2-inch Pieces (or Smaller)
2 Tablespoons Butter
1-½ whole Yellow Onion, Diced
5 ears Corn, Shucked (about 4 Cups of canned corn)
2 whole Chipotle Peppers In Adobo Sauce, Finely Diced
1 whole 4-ounce Can Diced Green Chilies
32 ounces, fluid Low Sodium Chicken Broth
1-½ cup Heavy Whipping Cream
½ teaspoons Kosher Salt (more To Taste)
3 Tablespoons Corn Meal OR Masa
¼ cups Water

slice the corn kernels off the cob or you can just use canned corn.
Add bacon to a or dutch oven over medium heat. Cook until golden and crispy. Throw in diced onion and stir, cooking the onion for 3 to 4 minutes until translucent. Add butter and melt. Add corn. Stir and cook for one minute. Add both kinds of chilies and stir.
Add in chicken broth and cream. Add salt. Stir and bring to a boil. Reduce heat to low.
Combine cornmeal (or masa) with water. Stir to combine, then pour into the chowder. Cover and cook for 15 minutes over low heat. If chowder needs more thickening, add another tablespoon of cornmeal mixed with water. Cook for another ten minutes.

Sunday, October 24, 2010

Homemade Halloween Funfetti


I love Halloween, I always have. When I was little it was because my mom would make me an awesome costume and I would get to gorge myself on candy. Now that I'm older its because I really enjoy seasonal baking, especially fall baking. When I went into walmart a few weeks ago I saw that they had Halloween funfetti cake mix and frosting. I picked up a container of each and I was on my way to the check out line when I thought to myself "hmmm I could probabbly make this myself really easily" so I put down the box of easy way out and backed slowly into my kitchen and these were the results.
Funfetti cake
I chose to bake mine as a sheet cake because thats the way I always had it as a kid but it would work as cup cakes too.

recipe
2 1/2 cups all-purpose flour
3 tsp baking powder
1/2 tsp salt
1 1/2 cup sugar
12 tbsp butter, room temperature
2 large eggs + 2 egg whites, room temperature
2 tsp vanilla extract (for a splurge, use vanilla bean paste!)
1/2 tsp almond extract
1 cup milk
4 tbsp rainbow sprinkles
Directions
Preheat oven to 350 degrees. Mix flour, baking powder, and salt together in a separate bowl. Add butter and sugar to another bowl and beat until creamy, about 3 minutes. Add eggs and egg whites one at a time, beating on low. Add extracts, beat another minute. Alternate adding the dry ingredients with the 1 cup milk, starting and ending with the dry ingredients. Stir in the sprinkles.
Bake for 17-20 minutes or until toothpick inserted into the middle comes out clean. Cool on wire racks.
Vanilla Buttercream
1 stick butter
3 1/2 -4 cups powdered sugar, sifted
1/8 cup milk
1 teaspoon vanilla
Beat the butter until creamy. Add powdered sugar, milk, and vanilla extract. Beat a few more minutes. For stiffer frosting, add more powdered sugar. For thinner frosting, add more milk.

Thursday, October 14, 2010

honey mustard pork roast


Sorry about the lack of an update last week, it's mid term season. Luckily it's fall break, so I've got lots of time to bake and stock up on posts for you guys. I was really excited to get home Wednesday being at home is a lot more comfortable and relaxing than being in a dorm. Plus the food is a lot better. About twenty minutes after I got home dad turns to me and says "Mom took a pork loin out of the freezer for dinner what do you wanna do with it." So I was officially in charge of dinner. I've already admitted to being a fan of the pioneer woman and now its time to reveal my other foodie favorite. I love For the Love of Cooking and when dad said pork loin my brain instantly went to this recipe that I had just recently come across. Boy am I glad it did.

Pork Tenderloin with a Honey Mustard Sauce:
1 tsp olive oil
1 pork tenderloin
Sea salt and freshly cracked pepper, to taste
1 tbsp Dijon mustard
1 tbsp grainy mustard
1 1/2 tbsp honey
1 1/2 tbsp apple cider vinegar
1 tbsp apple juice
1 tsp olive oil
2 cloves of garlic, minced

Mix together the Dijon mustard, grainy mustard, honey, apple cider vinegar, apple juice, 1 tsp of olive oil, and minced garlic together in a bowl. Cover and set aside for a few hours.

Remove the silver skin from the pork tenderloin then season with sea salt and freshly cracked pepper.

Preheat the oven to 425 degrees. Heat 1 tsp of olive oil in large cast iron skillet over medium-high heat. Once hot, add the pork tenderloin and cook until brown on all sides. Place the skillet into the oven, and bake for 15 minutes or until a meat thermometer registers 155-160 degrees (medium) or desired degree of doneness. Let stand for 5 minutes before slicing.

Heat the sauce in a small saucepan over low heat until warmed. Pour sauce over sliced pork.

Tuesday, September 28, 2010

Strawberry pie

For me summer hasn't really started until I've baked a strawberry pie. I'm also always sad when I'm making what I know will be the last strawberry pie of the season. This post is about the last strawberry pie of this summer. I got this recipe from cooks country and I love it. I know it backwards and forwards. I could make this pie in my sleep and to tell you the truth I'm proud of that. One reason I'm so proud of this pie is because my grandmother had a strawberry pie that she was known for. Her's was Shony's strawberry pie, it involved whole strawberries and strawberry gelatin. Now that I have a strawberry pie that I'm known for it gives me a sense of connection between my grandmother and I. It makes me very proud to know that I do something that reminds people of her because she was a truly amazing lady and it flatters me to think that her memory is somehow living on through me. I guess you could say that this pie has sentimental value for me. It also helps that it's delicious and easy to make.


Diner Style Strawberry Pie

1 pound of fresh strawberries cleaned, hulled, and sliced thin
2 pounds of frozen whole strawberries
2 tablespoons of lemon juice
2 tablespoons of water
1 tablespoon unflavored gelatin
1 cup of sugar
1 nine inch pie shell baked and cooled (I always use Pillsbury ready made crust)

place a large deep skillet over medium low heat. Put the frozen berries into the pan and stir them until they start to release a little juice. Turn the heat up to medium high and cook for about 20 minutes until the mixture is thick and jam like. It should measure 2 cups.
Mix the lemon juice and water and add the gelatin and stir. Let it stand for a few minutes until the liquid is absorbed. Add the gelatin mixture, sugar, and a pinch of salt to the pan with the strawberries bring to bubble and simmer for five minutes.
Transfer the mixture to a glass bowl and leave to cool for 30 minutes or until it reaches room temperature. Fold in the fresh berries, pour into the prepared pie shell and chill in the refrigerator for four hours. Top with a dollop of whipped cream.

Thursday, September 23, 2010

snickerdoodle blondies


Sorry for the late post. It has been a whirl wind week of homework and time with friends and my boyfriend. Yesterday would have been update day but I had three classes, a club meeting. Plus a trip to the trift store and a movie night with friends. I have to say I may be buying all of my books at the salvation army from now on. I got Georgianna the Duchess of Devonshire, The other Boelyn Girl, and pride and prejudice for $4.00. I'm covered on books at least until christmas.

As far as the world of baking goes, a craving hit me the other day. I needed something cakey and sweet ASAP. As I flipped through the recipe roladex in my head I started thinking about blondies. They would be perfect they were quick, simple, and comforting. With fall coming on I've been wanting to celebrate the season so a cinnamon sugar topping would be perfect. What could be better tahn a moist warm cinnamony blondie with a tall glass of milk.


Snickerdoodle Blondies
adapted from Dozen Flours

2 2/3 cups all-purpose flour
2 teaspoons baking powder
1 teaspoon cinnamon
1/4 teaspoon grated or ground nutmeg
1 teaspoon salt
2 cups packed brown sugar
1 cup butter, room temperature
2 eggs, at room temperature
1 tablespoon vanilla extract
2 tablespoons granulated sugar
2 teaspoons cinnamon
a pinch nutmeg

1. Preheat oven to 350 degrees F. Lightly grease a 9x13 inch pan. Combine the flour, baking powder, cinnamon, nutmeg and salt and set aside.
2. In large bowl, beat together butter and brown sugar until fluffy. Add in the eggs one at a time, then the vanilla, and beat until smooth.
3. Stir in the flour mixture until well blended. Spread evenly in prepared pan. Combine the granulated sugar, cinnamon, and nutmeg. Evenly sprinkle cinnamon sugar mixture over the top of the batter.
4. Bake 25-30 minutes or until a toothpick comes out clean. Cool before cutting. Makes 20-24 bars. Enjoy with a tall glass of milk or a scoop of ice cream.

Wednesday, September 15, 2010

burrito loco


There is a local Mexican resturaunt that everyone in my family and group of friends loves. Personally I'm a fan of the chorizo with eggs or the chicken quesidilla's but my boyfriend and his siblings all love the burrito loco. It's a huge flour tortilla stuffed with rice, beans, either sliced beef or shredded chicken and then it's topped with a white cheese sauce. It is a ridiculous amount of food but, I guess that's why it's the crazy burrito. Recently my boyfriend and I decided that we would make our own burrito loco's at home and I'd have to say ours might even be a little better than there's. We took a sort of Meixan Italian fusion route.

Recipe

Burrito Loco

cheese sauce
1/2 stick of butter(4 Tbs.)
1/2 onion
1 clove garlic
1/4 all purpose flour
1 cup of chicken broth
3/4 cup of milk
1 tsp. dried oregano
1 tsp. dried basil
1/4 cup parmesan cheese
1 cup mozzarella cheese
jarred jalapenos to taste
salt and pepper to taste

everything else
2lb. beef roast
salt and pepper
1/4 cup red wine
1 box of Spanish rice
1/4 cup ricotta cheese
6 burrito sized tortillas

Instructions
Pre-heat your oven to 375. Salt and pepper your roast and then place a cast iron skillet on the stove over medium high heat and when the pan comes up to temperature place the chuck roast in the pan and sear on all sides. Remove the pan from the heat and pour in the red wine. Transfer the pan to the oven and continue to cook the roast for 0ne hour. When the roast is done remove it from the pan and allow to rest for ten minutes. After it has rested slice the beef first into rounds and then into smaller strips or shred the beef using two forks.
Melt the butter and then sauté the onions until slightly soft add the garlic and sauté for about 30 seconds. Add the flour and stir until bubbly. Add the milk and the stock stir constantly until it comes just to a bubble. Add the herbs, jalapenos and the cheese. stir until the cheese is melted.
Prepare your box of Spanish rice per the manufacturers instructions.
In a large bowl mix the rice and the sliced beef together and stir in the ricotta cheese. Spray two 9x13" glass baking pans with non stick spray. Fill each of the burrito wraps with filling and then lay them seam side down in the baking dishes putting three in each. Top the burritos with the cheese sauce and bake at 350 for 20 minutes.

Wednesday, September 8, 2010

ranch chicken and an obsession


I'm not going to lie to you I have many obessions, knitting for example, also I'm kind of obsessed with collecting recipes, as the little pie chart representing free space on my hard drive would indicate. I also happen to play favorites with a few food celebrites. Alton brown is one of my heros as is Ina Garten but the food personality that I want to be most like would have to be the Pioneer Woman.

I heard about her through my cousin. After I visited her site a few times I was hooked. I loved her cooking style and the way she wrote her entries. She always sounds so down to earth and I love that she can own up to her flaws. It makes her very accesible. All of these things really helped me feel like I could handle writing a food blog. So today I'm paying tribute to Ree Drummond with her most sinful creation, ranch chicken. It's a delicious combonation of honey mustard marinated chicken breasts, sharp cheddar cheese, and bacon. It is amazing.


Ranch Chicken
adapted from the pionner woman

Ingredients
½ cups Dijon Mustard
½ cups Honey
½ whole (juice Of) Lemon
½ teaspoons Paprika
½ teaspoons Salt
Crushed Red Pepper (optional To Taste)
6 whole Boneless, Skinless Chicken Breasts
1 pound Thick Cut Bacon
Bacon Grease
Sharp Cheddar Cheese, to taste
Canola Oil


In a large bowl mix together Dijon, honey,lemon juice,paprika, and salt and whisk until smooth. Sprinkle in some crushed red pepper flakes or cayenne if you like. Set aside.
Next, rinse the chicken breasts, place on a sheet plastic wrap and fold it in half over the chicken then pound to around ½ to ¾ inch thick with a mallet. Next, add the chicken to the bowl with the marinade, cover with plastic wrap and place in the refrigerator for between 1 to 3 hours.
While the chicken marinates, fry up some bacon. When finished cooking, reserve ¼ cup of the bacon grease and clean out the skillet.
When the chicken is done marinating, preheat the oven to 400 degrees. Remove the chicken from the fridge and pour off excess marinade. Heat half of the reserved bacon grease with an equal quantity of Canola Oil in the clean skillet over medium-high heat. When the grease is nice and hot add two or three pieces of chicken to it. Cook until brownish/blackish, about 1 to 1 ½ minutes per side. Remove chicken to a large baking sheet. If cooking many pieces of chicken, repeat skillet process and remove finished chicken to baking sheet. Place chicken in preheated oven and cook for about 10 minutes. Remove from over.
Lay a few pieces of bacon over each chicken breast. Sprinkle shredded sharp cheddar cheese over the top of the chicken as generously as you like. Return pan to oven for an additional five minutes until cheese is melted and bacon is sizzling.

Monday, August 30, 2010

risotto: italian comfort food


I love comfort food. It makes up the majority of what I cook and what I enjoy eating. Comfort food is simple, filling, and homey. Plus is can make you feel better when nothing else will. As a 20 year old college female when something goes wrong I eat my feelings. When I'm sad I curl up with a pint of Starbucks chocolate chip frappaucion ice cream. If I'm stressed out while I'm working on school work I sit at my desk and munch cashews or a home made snack mix that I hope to share with you soon. I'm sure many of you can sympathize. Risotto is comfort food at it's finest. It's creamy and luscious and warm. The perfect thing for a cold day. Plus this Risotto Milanese is such a warm yellow that it's cheers me up just looking at it.
Risotto Milanese

1/4 cup extra-virgin olive oil
1 medium onion, cut into 1/4-inch dice
1 teaspoon saffron threads
3 1/2 cups chicken stock, hot
2 cups arborio rice
1/2 cup white wine
4 tablespoons (1/2 stick) unsalted butter
1/2 cup freshly grated Parmigiano-Reggiano, plus more for sprinkling

In a large dutch oven or another deep pot, heat the olive oil over medium heat. Add the onion and cook until softened and translucent, 8 to 10 minutes. Meanwhile add the saffron to the stock, stirring to infuse. Once the onions are translucent add the rice and stir with a wooden spoon until toasted and opaque, 3 to 4 minutes.
Add the wine to the toasting rice, and then add a 4 to 6-ounce ladle of the saffron-infused stock and cook, stirring, until it is absorbed. Continue adding the stock a ladle at a time, waiting until the liquid is absorbed before adding more. Cook until the rice is tender and creamy and yet still a little al dente, about 15 minutes. Stir in the butter and cheese until well mixed.

Wednesday, August 25, 2010

S'mores chcolate bark


I recently had a culinary epiphany. I knew that I wanted to make chocolate bark but I couldn't decide what I wanted to put in it. I thought about doing hazelnuts or cherries but nothing really seemed right. Then I was looking at recipes on My Baking Addiction one day. She had made s'mores brownies and that's when it hit me. I could totally make s'mores chocolate bark. It was probably the easiest thing I've ever made. This would make a perfect gift. You could make a big batch throw some in a glassine bag and impress all of your friends and family with your amazing candy making skills.

S'mores Chocolate Bark

6 ounces of dark chocolate
6 ounces of semi sweet chocolate
4 graham crackers broken into rough pieces
1 cup miniature marshmallows

place a sheet of parchment paper over a cookie sheet. Roughly chop the chocolate and place it in a double boiler or a glass bowl over a pot of water. Bring the water the a low boil and stir the chocolate until completely melted. pour the melted chocolate over the parchment paper in a rough rectangle. sprinkle the graham cracker pieces over the chocolate making sure to give each piece a little press. Do the same with the marshmallows and then leave the bark to set for at least two hours.

Sunday, August 15, 2010

Ina Garten's Brioche


I found myself in a bit of a cooking funk last week. I just wasn't really feeling like making anything. After giving it some thought I realized that I hadn't been challenging myself. I'd just been making things that were easy or familiar so I've compiled a list of things that will test my culinary skill. I could potentially end up very frustrated and in tears by the end of this list but hopefully I'll make my way through it and be the better baker because of it. Things on the list include french macaroons, doughnuts, caramels, and peanut brittle. I've been wanting to make brioche for a while and I figured it would be a good place to start. Now that I've made it, it really wasn't nearly as hard as I would thought it would be. The only hard part was having the patience to leave it in the fridge over night. The best part of this recipe is that you don't have to go out and buy any of those silly little fluted brioche cups. All you need are two loaf pans.
Ingredients
2 1/4 teaspoons active dry yeast
1/2 cup hot water (between 100 and 120 degrees)
3 tablespoons sugar
6 eggs at room temperature
4 1/4 cups unbleached flour
2 teaspoon Kosher salt
2 sticks of butter at room temperature
1 egg mixed with 1 tablespoon milk or water, for the egg wash

Place the water, yeast, and sugar in the bowl of an electric mixer. Mix with your hands, and allow it to sit for 5 minutes, until the yeast and sugar are dissolved.
Add the eggs and beat using the paddle attachment on medium speed for 1 minute, until well mixed. On low speed, add 2 cups of flour and the salt, and mix for 5 minutes. Still on low speed, add another 2 cups of flour, and mix for another 5 minutes. Add the butter cubes and mix for 2 minutes. With the mixer still on low speed, add the remaining 1/4 cup of flour. Switch the paddle attachment to a dough hook, and mix on low speed for a final 2 minutes.
Scrape the dough into a large, buttered bowl. Cover with plastic wrap, and refrigerate overnight.
The next day, allow the dough to sit at room temperature for 1 hour. Meanwhile, grease two 8½ x 4½ x 2 ½–inch loaf pans.
Turn the dough onto a lightly floured board. Cut the dough in half, and pat each half into a 6×8-inch rectangle. Roll up each rectangle into a cylindrical loaf. Place each loaf, seam side up, into a greased pan. Cover the pans with a towel, and allow them to rise for to 2 to 2 1/2 hours. They should almost double in size.
Preheat the oven to 375 degrees. Remove the towels, and lightly brush the top of each loaf with the egg wash. Bake for 40 to 45 minutes or until the top springs back and the loaf sounds slightly hollow when tapped.
Turn the loaves out onto a wire rack until completely cool.

Tuesday, August 10, 2010

Pumpkin Spice Granola


I figure it's about time that I start living up to my name. If I'm going to call my self hippie hippie bakes then I should probably share some hippie food. Granola is the first thing that comes to my mind when I think of hippie food. Lentils are a close second though. Quinoa is probably third. Granola is actually one of my comfort foods at school. My mom will make a batch for me on a weekend when I come home and I'll take it back with me and snack on it all week. Its nice to have something that I eat all the time at home at school with me. When I got home from school I started looking for some granola recipes to make on my own. When I stumbled across this recipe from Healthy food for Living I was so excited. I have an obsession with pumpkin spice. Everything from coffee to baked goods. If it is pumpkin spice flavored I'm in. So this was perfect.

Pumpkin Spice Granola

3 cups rolled oats
1 tsp pumpkin pie spice
1/4 tsp salt
1/4 cup light brown sugar
1/4 cup pumpkin puree
2 Tbsp unsweetened applesauce
2 Tbsp pure maple syrup
1/2 tsp vanilla extract
3/4 cup chopped nuts and/or seeds
1/2 cup dried fruit

Preheat oven to 325*F and line a cookie sheet with parchment paper.
Measure the oats into a large bowl and put aside.
In another bowl, whisk the pumpkin pie spice, salt, brown sugar, pumpkin puree, applesauce, maple syrup, and vanilla extract. Mix until smooth.
Pour wet ingredients over oats and stir until thoroughly combined. Spread in an even layer over the prepared cookie sheet.
Bake for 30 minutes. Remove from the oven, stir the nuts & seeds into the granola, and bake for an additional 10-15 minutes, or until the granola is golden brown and crisp.
Remove granola from the oven, toss with dried fruit, and cool completely. Store in an airtight container.

Saturday, August 7, 2010

My family lives to eat

Vacations in my family are usually centered around food. Weeks before hand we scope out the best restaurants and plan out activities around eating. This year my family spent three days at Kings Mill Resort in Williamsburg Virginia. It's a huge place. There was an indoor and outdoor pool, a gym, a spa, tennis courts, 63 holes of golf and lots of water sports to participate in on the James River. Most importantly there were 5 restaurants on premises. The when we first got there we immediately went to eat at the club house. I had a delicious salmon burger with lettuce, tomato, sprouts, and tarragon mayo. I also had a side of Dijon potato salad which was amazing. Sadly I don't have a picture, but trust me it was pretty.

This was the view from our table

That night for dinner we had the pleasure of eating at the marina restaurant. We ate out on a deck overlooking the James and we were seated at a half circle counter around a fire pit. I had grilled swordfish with mango relish, cucumber and dill salad, and steak fries. It was amazing. My aunt enjoyed crab legs and my brother had rib fingers with coleslaw.

My delicious swordfish


My aunt's crab legs


My brothers ribs

Lunch on Thursday was from Regatta's at the resort. They're famous for their pizza that's baked in a wood fired oven. We ordered one margarita pizza and one pizza called the godfather which had sausage, pepperonis, onions, mushrooms, and peppers. They were delicious. The crust was thin and crispy and perfect. The wood fired oven had given it just the right amount of smoky flavor. Sadly there isn't a picture because I was too busy stuffing my face. I'm really looking forward to next year so I can further explore Kings Mill culinary offerings.

Sunday, August 1, 2010

A simple summer classic


My family has a bit of a problem. We are food hoarders. Our pantry is always overflowing and in recent months its started to eat at me. I can never find anything when I need to. So I've started trying to find recipes that can help use up random or off the wall ingredients that are just taking up space. I recently made pork chops crusted with Melba toast that were good. The box of Melba toast had been in our pantry for a while and I was getting sick of looking at it. May be I'll post that some time. However a single box of Melba toasts is not our biggest problem. We have and entire storage basket full of jello and pudding mix. No one needs that much jello. No one. So I turned to a humble Kraft kitchen creation straight out of the 1950's, poke cake, specifically peach poke cake.
Peach poke cake
adapted from Kraft Food Kitchens

Ingredients
1 box cake mix
2 packages of any flavor jello (I used peach)
1 tub whipped topping

Prepare the cake mix according to instructions and place in two nine inch cake pans and bake per instructions. Remove the cakes from the pans and move to a wire rack to cool. Then place the cooled cakes back into their pans.

Poke the cakes with a large skewer at half inch intervals. Prepare the jello according to the instructions but do not refrigerate. While the jello is still warm pour it over the prepared cakes and place in the refrigerator for at least 3 hours.

when you're ready to finish the cake dip the cake pans in very hot water and rotate for about 30 seconds. Turn the first cake onto a plate and then onto a cake stand. Use the whipped topping to frost just the top of the first layer and then turn the second layer on top of the first. Frost the cake with the renaming whipped topping. This cake has to be stored in the refrigerator.

Saturday, July 24, 2010

I've got the blues


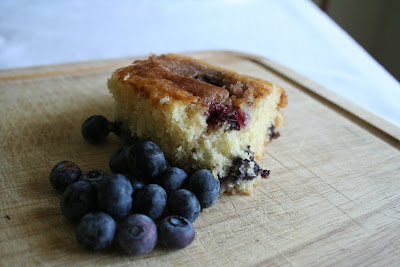
Where I'm from mid July means blueberry season is officially on, so I wasn't surprised when I came across a nice full basket of local blueberries at the organic market. I was really glad to see them. I haven't had a chance to go blueberry picking at my local U-pick farm yet this summer because I've been working a lot, but I'm definitely itching to go. My head is full of visions of canned blueberry syrup and blueberry pie. The farm where my mother and I pick blueberries also has apple and peach orchards so when we go up there its kind of like one stop local fruit shopping. It's a foodies paradise, and considering that all of the fruit is 75 cents a pound it isn't to bad on the pocket book either. So I encourage all of you to find your local U-pick farm and live it up. Your tummy will be well rewarded for all of your hard work. Plus a little sweat always makes the fruit taste better.

blueberry boy bait
recipe adapted from cook's country

For the Cake:
2 cups all-purpose flour, plus 1 teaspoon
1 tablespoon baking powder
1 teaspoon table salt
16 tablespoons (2 sticks) unsalted butter, softened
¾ cup packed light brown sugar
½ cup granulated sugar
3 eggs
1 cup whole milk
½ cup blueberries
For the Topping:
½ cup blueberries
¼ cup granulated sugar
½ teaspoon ground cinnamon
1. For the Cake: preheat oven to 350 degrees F. Grease and flour a 13×9-inch baking pan.
2. Combine flour, baking powder, and salt together in a medium bowl; set aside. With a stand mixer, beat the butter and sugars together on medium-high speed until fluffy. Add eggs, one at a time, beating until it just comes together. Reduce speed to medium and beat in one-third of the flour mixture until just mixed; beat in half of the milk. Beat in half of the remaining flour mixture, then remaining milk, and finally remaining flour mixture. Toss the blueberries with remaining 1 teaspoon flour. Using a rubber spatula, fold in blueberries. Spread the batter into the prepared pan.
4. For the Topping: Scatter the blueberries over top of the batter. Stir the sugar and cinnamon together in a small bowl and sprinkle evenly over the cake. Bake until toothpick inserted in center of cake comes out clean, 45 to 50 minutes. Cool in pan 20 minutes, then turn out and place on serving platter or storage container.

Saturday, July 17, 2010

how to beat the heat


It has been scorching hot here in the mid Atlantic all week. On top of that I work in a kitchen all day. We have no air conditioning and we run a griddle, a microwave, and a panini grill all day so its at least ten degrees hotter int he kitchen than it is outside. it's unpleasant. At the end of the day I'm in need of some serious relief. Sometimes I just want to curl up in the chest freezer, but doing so would be extreme and unsafe. So I usually just settle for the pool but ice cream has to be the best and tastiest form of relief. Home made ice cream is worth the work even on a hot day. It's so much better that anything that's going to come form a cardboard tub form the grocery store. This brown sugar ice cream is an especially worth the work.

Brown sugar ice cream
adapted from Bon appetit

1 1/2 cups heavy whipping cream
1 1/2 cups whole milk
3/4 cup dark brown sugar, divided
1/2 vanilla bean, split lengthwise
6 large egg yolks

In a large sauce pot combine heavy whipping cream, whole milk, and 1/2 cup sugar. Scrape in seeds from vanilla bean and add bean. Bring cream mixture to simmer over medium heat, stirring constantly.
Whisk yolks and remaining 1/4 cup sugar until very thick.

Slowly whisk hot cream mixture into the yolk mixture. Return mixture to saucepan and heat over medium heat until custard thickens and thermometer reads 180°F. Strain custard through a sieve into large bowl. Cover and chill overnight.

Process the custard in ice cream maker according to manufacturer's instructions. Transfer ice cream to container. Serve immediately as soft serve or cover and freeze until firm.

Friday, July 9, 2010

a change of pace


So far all of my recipes have been sweet. I started thinking it might be time for something a little different. I got inspired by Diners Drive ins and Dives. The other night Guy Fiere was at a place that made the most amazing looking chicken a la king. I love chicken pot pie and to me chicken a la king is basically chicken pot pie with out all that pesky crust getting in the way. This recipe from Americas Test Kitchen was everything I wanted chicken a la king to be. It's creamy and rich and comforting.


Chicken A la king
3/4 cup heavy cream
2 tablespoons lemon juice
Salt
4 boneless, skinless chicken breasts cut into 1-inch pieces
1 tablespoon vegetable oil
1 onion , diced
8 ounces white mushroom , sliced thin
1 red bell pepper , diced
1 cup frozen peas and carrots
1/4 teaspoon pepper
3 tablespoons all-purpose flour
1/2 cup white wine
1 1/2 cups low-sodium chicken broth
2 tablespoons fresh parsley , finely chopped

1. Whisk together cream, lemon juice, and in bowl. Combine chicken and cream mixture in large bag and refrigerate 30 minutes.
2. Heat oil in large skillet over medium-high heat. Cook onion until golden. Add mushrooms, bell pepper, salt, and pepper and cook until vegetables have softened. Stir in flour and cook 1 minute. Add wine, scraping up any browned bits with wooden spoon, and cook until thickened. Add broth and remaining cream and cook until sauce is very thick and spatula leaves trail when dragged through sauce.
3. Stir in chicken mixture and reduce heat to medium-low. Simmer, stirring frequently, until chicken is no longer pink, about 10 minutes. Off heat, stir in remaining lemon juice and parsley. Serve with toast or over biscuits.

Friday, July 2, 2010

regarding hobbits and tea cakes...


Before I left school in May I decided I was going to read The Hobbit and The Lord of the Rings series while I was home for the summer. As I started reading I realized that hobbits are my kind of people. They eat six meals a day, they love to throw parties and give away presents. There's always a kettle on the fire and pantries full of food. As I read the description of the food that Bilbo served the dwarfs I started to get hungry. Visions of vintage tea pots and dessert trays full of little cakes were dancing in my head and so I did what any girl would do. I opened my cook books and double knotted my apron strings.
I used Dorie Greenspan's recipe for Swedish Visiting Cake but I baked it in muffin tins instead of a skilled and viola a tea time treat perfectly paired with a cup of Earl Gray. Now if only I had a fire place and a cushy chair to curl up in so that I can continue to enjoy The Lord of the Rings series. Oh well it is July so I suppose I don't really need a roaring fire.


Recipe
- 1 cup sugar, plus extra for sprinkling
- Grated zest of 1 lemon
- 2 large eggs
- 1/4 teaspoon salt
- 1 teaspoon pure vanilla extract
- 1/2 teaspoon pure almond extract
- 1 cup all-purpose flour
- 1 stick unsalted butter, melted and cooled
- About 1/4 cup sliced almonds

1. Preheat the oven to 350 degrees F. Grease and flour a 12 cup muffin tin or a 9-inch cake pan.

2. in a medium bowl blend the zest and sugar together with your fingertips until the sugar is moist and aromatic. Add the eggs one at a time until well blended. Add in the salt and extracts. Use a rubber spatula to stir in the flour. Finally, fold in the melted butter.

3. use and ice cream scoop or 1/3 cup measure to evenly distribute the batter into each muffin cup, smooth the top with a rubber spatula. Scatter the sliced almonds over the top and sprinkle with a little coarse sugar.

4. Bake the cakes for 25 to 30 minutes, or until they are golden and a little crisp on the outside. Remove the pan from the oven and let the cake cool for 5 minutes, then turn them out onto a cooling rack.

Sunday, June 27, 2010

A productive day


I usually work five days a week and one of my days off is usually a Sunday. My Sundays are pretty much booked up in advance. First its church then my grandparents house for lunch then cleaning and what not. So I get one full day to sleep in chill out and just do what I want. Oh how I love that day. On my most recent day off I woke up with a plan to bake. I just had no idea what I wanted to make. As I sat sipping my coffee I thought. "hmm coffee cake would be good...no no sticky buns. Maybe lemon curd." I couldn't make up my mind so I decided to turn to my stock pile of internet recipes. I logged into my TastyKitchen account on The Pioneer Woman's website. That's where I found it. Italianfoodforever's recipe for chocolate chip cream cheese pound cake. I quickly set to work preparing my mes en plas. As I was going to get my chocolate chips I thought "what if I used white chocolate chips?" And that's when things got interesting. I proceeded to tinker and this was the resulting cake.


White Chocolate Coconut Pound Cake


2 cups All-purpose Flour
1 teaspoon Ground Cinnamon
1 pinch Salt
1-½ teaspoon Baking Powder
¾ cups Softened Butter
8 ounces, Cream Cheese, Softened
1-½ cup Sugar
1-½ teaspoon Coconut Extract
4 Eggs

Preheat oven to 325 degrees F. Butter and flour a medium bundt pan. Combine together flour, cinnamon, salt, and baking powder. In a stand mixer beat together the butter and cream cheese with the paddle attachment. Add the sugar and cream until light and fluffy. Add the coconut extract and then the eggs one at a time. Add the dry ingredients and continue to mix on low just until combined. Then add the chocolate chips. Do not over mix. Scrape the mixture into your prepared pan, the batter will be very stiff, and bake for 50 to 60 minutes or until a cake tester comes out clean.

Tuesday, June 22, 2010

Nutella Chocolate chip cookies


It has been one heck of a week. After working five straight days in a row I have two off. Hopefully I can catch up on my baking. I know for a fact that there is mint Oreo ice cream in my future but hopefully there will also be a pie. After a crazy week like this I need some comfort and a little pampering. That's where the nutella comes in.

I love nutella. It's the perfect balance of chocolate and hazelnut and the texture is so creamy and smooth. I could eat it by the spoonful but I prefer to incorporate it into recipes. These cookies are amazing. The cinnamon is a perfect compliment to the nutella and the chocolate chips just make the cookies that much more decadent. The best way to enjoy these cookies is to spread nutella between two cookies while they're still warm.

Nutella chocolate chip cookies
Recipe: Adapted from Alpineberry
Yeild: About 24 - 30 cookies
Ingredients:
• 1 1/3 cup all-purpose flour
• 1 tbsp unsweetened cocoa
• 1/2 tsp ground cinnamon
• 1/4 tsp baking powder
• 1/4 tsp baking soda
• 1/2 tsp of salt
• 7 tbsp unsalted butter, at room temp.
• 2/3 cup granulated sugar
• 1/3 cup light brown sugar
• 2/3 cup Nutella (chocolate hazelnut spread)
• 1/2 tsp vanilla extract
• 1 large egg
• 1/2 cup semisweet chocolate chips
• 1/4 cups chocolate chips

Directions
1. combine flour, cocoa, cinnamon, baking powder, baking soda and salt and set aside.
2. Cream butter, granulated sugar and brown sugar until light and fluffy. Add Nutella and vanilla extract and beat until combined. add in egg beat until incorporated and then scrape down the sides.
3. Add flour mixture and mix until just incorporated. Add chocolate chips.
4. Chill for 1 hour.
5. Drop tablespoons of dough 2 inches apart onto baking sheets. Bake at 350 for about 11 minutes until the edges look set. Cool on baking sheet for 5 minutes then move to cooling racks.

Wednesday, June 16, 2010

a cookie on steroids: a.k.a chocolate chip cookie cake


The food in my school cafeteria is pretty bad. It's hard to find anything even remotely healthy. The only things that really taste good are the things that are seriously unhealthy like corn dogs, french fries, and chicken tenders.
The desserts though, the desserts are consistently good. The best of all is the chocolate chip cookie mush, that's not its official name that's just what my friends and I have come to call it. It's warm and gooey and chocolatey essentially perfect. I've been home for about a month now and I started to crave chocolate chip cookie mush and so I sought out a recipe to fill the void and boy did this one do the trick.

Chocolate Chip Cookie Cake :
(from Dam Good Sweet by David Guas and Raquel Pelzel)
1 stick (113g) butter
1 1/4 cup semisweet chocolate chips (58%-62% cacao)
1 cup plain flour
1 1/2 teaspoons baking powder
1/4 teaspoon salt
1 cup light brown sugar
1 teaspoon vanilla extract
1/2 teaspoon almond extract
1 large egg
Preheat the oven to 175′C.
Whisk the flour, baking powder and salt together in a medium bowl and set aside. Using a stand mixer or a hand mixer, cream the butter, light brown sugar, and vanilla and almond extracts on medium speed until well combined, about 1 minute. Increase the mixer speed to high and beat for 15 seconds. Stop the mixer, scrape down the sides of the bowl, and add the egg. Blend on medium speed for 30 seconds. Add the dry ingredients and combine on low speed until just a few dry streaks remain. Add the chocolate chips and mix for a few seconds until combined.
Scrape the batter into a greased and lined 10-inch round cake tin. Press the batter into a smooth and even layer in the pan. Bake until lightly golden and puffy around the edges (the center should still feel quite soft), 18 – 22 minutes. Cool for 10 minutes and then run a paring knife around the edge of the pan to release the cake. Cool for at least 4 hours before turning the cake out of the pan and onto a large plate.

Thursday, June 10, 2010

A quest comes to an end...


In recent months my mom and I have begun to make as much of our food in our own home. I really enjoy the peace of mind that comes from knowing exactly whats in your food. We've been experimenting with everything from granola bars, to pickles, to bread. Bread has been the thing we've really been pursuing. A few weeks ago I stumbled upon a recipe that has quickly become our staple whole wheat bread and like so many other great things it was formed out of a flop.

This recipe was originally a cinnamon raisin bread recipe that I was making for my mom because its her favorite. Apparently I put too much cinnamon sugar in my bread because it didn't exactly stand up straight. My mom being the loving person that she is ate the bread even though it wasn't stellar. After the loaf was gone she said "You know that bread had really good whole wheat flavor." and so I decided to tweak it to better suit our needs.

I'm so glad I did because this has become our go to whole wheat bread recipe. it's great for sandwiches or toasted with butter. It's got a nice sweetness but also has the healthy element of whole wheat. Plus its super simple. The recipe goes like this:

Ingredients:
- 2 cups Bread flour
- 1 cup of whole wheat flour
- 1 1/2 cup of warm water (104-108 degrees F)
- 3 tablespoons of sugar
- 1 ¼ teaspoons yeast
- 1 tablespoon of canola oil
- 1/2 teaspoon of salt
- 1 egg


Directions:
Add the water to a warmed bowl (run it under some hot water so it will keep the temp. )
Add the 3 TBL of sugar. Stir briefly to dissolve.
Sprinkle the half packet of yeast over the top. DO NOT STIR. Cover bowl with towel and let rest for a few minutes.
Check yeast to see if it's puffing up. If the yeast is still grainy and not puffy, throw it out and start all over. Inactive yeast will cause your bread to flop.
Add 1 cup of whole wheat flour and stir vigorously with a whisk for a minute.
Add the salt and the canola oil. Stir vigorously again.
Add 1 cup of bread flour and stir with a wooden spoon.
Continue to add the bread flour 1/2 cup at a time until it is too stiff to stir and is hardly sticky at all.
Dump dough onto a floured surface and knead with your hands.
Add light sprinklings of flour as needed and continue to knead until the dough is nice and tight.
Place the dough into a lightly oiled bowl, cover with a towel and let it rise until doubled in size. (at least 30-40 minutes)
Punch down the dough to release the air bubbles, cover again and let it rise again.

Roll the dough out on a lightly floured surface and form a loaf.

Place into a greased loaf pan and allow to rise for about 20 minutes. Now preheat your oven to 375 degrees F.

If you want a nice sheen to the top of your loaf this is the time to brush on some egg wash. Scramble the 1 egg in a bowl with about a 1/4 cup of water and brush this mixture over the top of your loaf.
18. Bake loaf 35-45 minutes. Check for doneness by pulling the loaf out and tapping it on the bottom. If it sounds hollow- it's done. If it still sounds dense put it back in for a few more minutes and check again.
When it's done, immediately remove it from the pan and place on a cooling rack to to rest.
Cut it and eat it! Just remember not to wrap the bread while it's still warm because it will get soggy. Let it come to room temperature before storing it in a zip loc bag. It stores well in the fridge and the freezer.